CURRENT MACHINE VISION CAPABILITIES AND
OPPORTUNITIES
Much of the variability in the measurement process
is a result of errors associated with visual inspec-
tion. Since the auto mechanic positions the depth
gauge by eye, their visual acuity and patience are
an integral part of the overall measurement process.
While a depth gauge is a cost-effective tool, its use
for this measurement might not be the most eco-
nomically sound decision. The economic expense
of discarding tires with usable life may outweigh the
economic benefits of using an inexpensive depth
gauge (or penny) for the assessment.
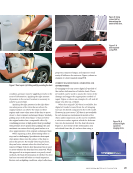
Tire tread depth can also be measured using
3D imaging approaches that incorporate struc-
tured light projection with machine vision
systems. Structured light projection systems illu-
minate the object under inspection with a pattern
of light, which can be either static or dynamic
(time-varying). Machine vision systems are typ-
ically calibrated camera systems that acquire a
high-fidelity image of the object under inspection.
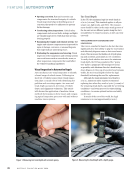
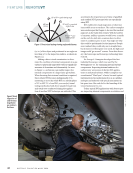
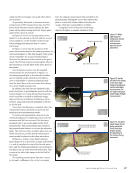
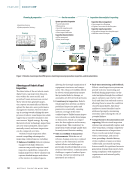
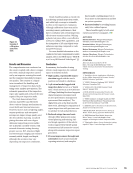
The most common method of structured light is
laser line scanning. Laser line scanning is a simple
form: the projected pattern is a line. In a laser line
scanning system, a laser line is projected onto the
surface of an object, and a machine vision camera
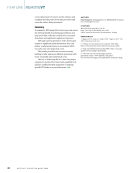
captures the resulting image. From this image, the
3D profile of the surface can be determined. By cap-
turing a series of profiles, the surface of an object
can be reconstructed as a 3D digital model.
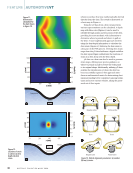
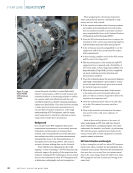
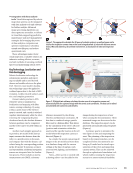
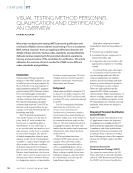
When measuring tread depth using a laser line
scanning system, the tread depth can be calcu-
lated from the resulting 3D model. This is typically
done by creating a reference surface from the tire’s
contact area (the part of the tire that touches the
road) and using this reference surface to calculate
the depth of the tread. With a sufficiently detailed
3D model, statistical variations in tread depth can
be analyzed. These statistical variations in tread
depth can provide valuable information regard-
ing the safety of the vehicle. For instance, the wear
pattern across the tire’s surface can reveal alignment
problems.
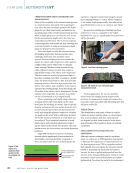
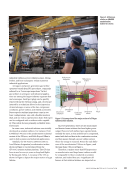
Gage R&R measures of laser line scanning
systems exhibit significantly lower variances in
repeatability and reproducibility compared to
those associated with the use of depth gauges by
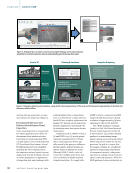
operators. A typical measurement range for a laser
line scanning system is 0.008 in. When compared
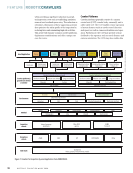
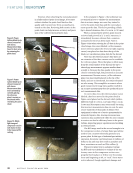
to the earlier depth gauge results, this reduces the
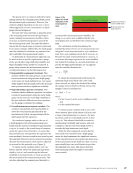
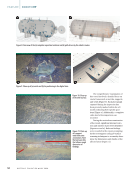
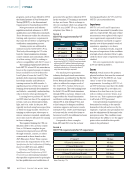
guard band from 0.0129 in. to 0.0026 in. (see Figure
4).
Because the resulting pass/fail limit has been
reduced to 0.0651 in., compared to the earlier
threshold of 0.0755 in., significantly fewer good tires
will be discarded.
For this application, the use of a machine
vision–based 3D imaging system improves the
accuracy of measurement results and reduces the
economic waste associated with discarding tires that
still have usable life.
Vehicle Dents
The identification and repair of dents in vehicle
bodies are almost entirely reliant on visual inspec-
tion. Auto mechanics and dent repair special-
ists depend on their visual acuity to locate dents
and determine if the repair has been successfully
completed.
VISUAL INSPECTION CAPABILITIES AND
LIMITATIONS
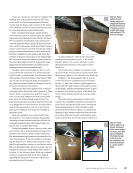
Although various techniques exist for repairing
dents, we will focus on PDR (paintless dent repair)
to illustrate the importance of visual inspection in
the dent repair process. PDR is a popular method
that typically does not require the removal of body
panels or pounding out dents from the interior.
Instead, the dent is pulled and pounded from the
exterior of the damaged body panel. Dents in metal
structures contain areas of both plastic and elastic
deformation. To restore the metal to its undamaged
FEATURE
|
AUTOMOTIVEVT
Pass with 95% confidence
Fail
Tread fail limit 0.0651 in.
based on GR&R results
Minimum legal tread
depth 0.0625 in.
Figure 4. The
impact of a
machine vision
system on the
tread depth fail
limit.
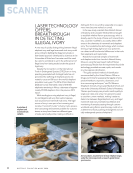
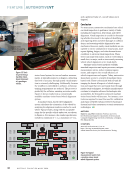
Figure 5. Laser line scanning system.
Figure 6. 3D model of a tire with tread depth
measurement result.
28
M A T E R I A L S E V A L U A T I O N • J U L Y 2 0 2 4


