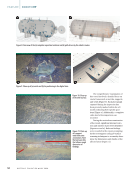
vision–based system, for toe and camber measure-
ments, is typically around 0.02 degrees. Achieving
this level of accuracy through purely visual inspec-
tion is extremely challenging. Additionally, because
the workflow is embedded in software, technician
training requirements are reduced. The process is
guided by the software, ensuring accurate results.
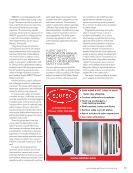
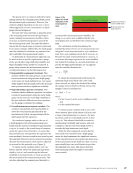
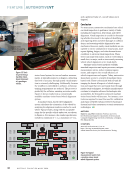
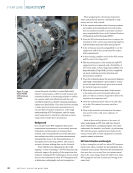
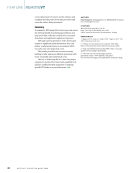
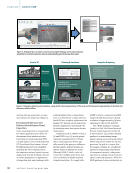
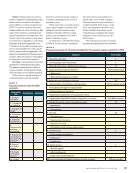
Figure 16 shows results from a commercially
available machine vision–based wheel alignment
system.
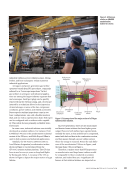
A machine vision–based wheel alignment
system calculates the orientation of the wheels by
analyzing the alignment markers attached to each
wheel. Typical results, along with the acceptable
range for the specific vehicle under test, are shown
in Figure 16. For instance, the camber specification
includes a minimum of –1.75, a maximum of –0.25,
and a preferred value of –1.00 (all values are in
degrees).
Conclusion
For many years, automotive mechanics have relied
on visual inspection to perform a variety of tasks,
including tire inspection, dent repair, and wheel
alignment. Visual inspection is crucial for determin-
ing whether tires need to be replaced, identifying
and repairing dents and other damages in collision
shops, and assessing vehicle alignment by auto
mechanics. However, purely visual methods are sus-
ceptible to errors. Limitations in visual acuity, inad-
equate lighting, fatigue, and other human factors
contribute to errors in visual inspections. These
errors can range from minor, such as overlooking a
small dent, to major, such as inaccurately assessing
vehicle wheel alignment or tire tread depth.
Machine vision–based methods establish
standard inspection and repair processes, mitigate
measurement errors, reduce training require-
ments, and improve the overall efficiency of
vehicle inspections and repairs. Today, automotive
shops have access to a variety of machine vision–
based tools. These tools include both 2D and 3D
imaging for almost all aspects of vehicle inspec-
tion and repair that were previously done through
purely visual techniques. As vehicle manufacturers
continue to integrate advanced technologies into
automobiles, the demand for advanced machine
vision–based tools will increase. For instance, new
tools are required to meet the need for calibration
and repair of ADAS (Advanced Driver Assistance
Systems) and other autonomous or semi-autonomous
technologies.
AUTHOR
Daniel L. Lau, PhD: Databeam Professor and Certi-
fied Professional Engineer, Department of Electrical and
Computer Engineering, University of Kentucky, Lexington,
KY dllau@uky.edu
CITATION
Materials Evaluation 82 (7): 24–32
https://doi.org/10.32548/2024.me-04447
©2024 American Society for Nondestructive Testing
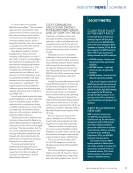
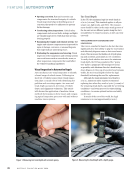
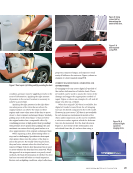
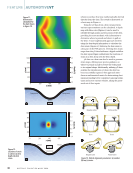
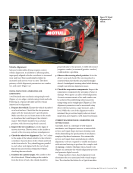
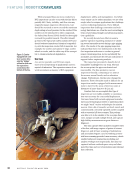
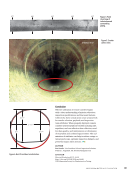
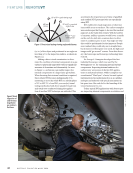
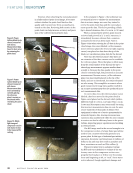
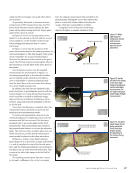
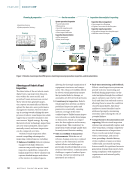
• Camera systems acquire
images of targets that
are attached to the vehicle
wheels
• A rotating turntable under
the steering wheel facilitates
castor measurements
Typical camera
systems for acquiring
images of targets
Typical camera systems for
acquiring images of targets
• Camera systems acquire images of targets that
are attached to the vehicle wheels
• A rotating turntable under the steering wheel
facilitates castor measurements
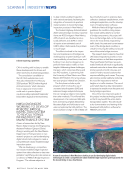
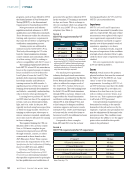
Figure 15. Tools
for performing a
machine vision–
based alignment
of a passenger
vehicle.
min –1.75
pref –1.00
max –0.25
min 0.00
pref 0.10
max 0.20
min –1.55
pref –0.80
max –0.05
min –0.03
pref 0.13
max 0.28
min –1.75
pref –1.00
max –0.25
min 0.00
pref 0.10
max 0.20
min –1.55
pref –0.80
max –0.05
min –0.03
pref 0.13
max 0.28
Rear Front
Camber –1.05
Toe 0.15
Camber –0.80
Toe 0.15
Camber –2.30
Toe –0.25
Camber –1.65
Toe –0.25
min – – –
pref – – –
max – – –
min – – –
pref – – –
max – – –
Caster 3.35 Caster 3.25
Adjust assistance
–0.05 0.25 0.55
Total toe
–0.10
–0.05 0.25 0.55
Total toe
–0.10
–0.30 0.0 0.30
Thrust angle 0.20
Figure 16. Typical
measurement results from
a machine vision–based
wheel alignment system.
FEATURE
|
AUTOMOTIVEVT
32
M A T E R I A L S E V A L U A T I O N • J U L Y 2 0 2 4


