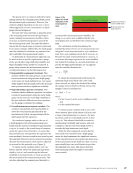
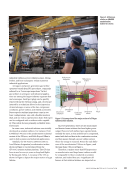
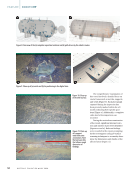
reference surface that was mathematically derived
directly from the data. The result is illustrated as
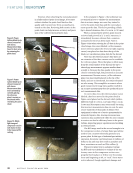
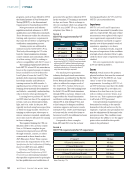
a heat map in Figure 11.
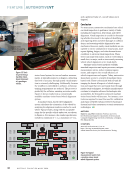
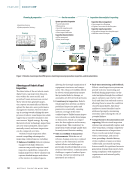
Using the 3D data from a dent measurement,
various representations can be calculated. A depth
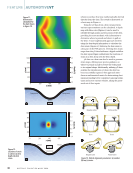
map with false color (Figure 11) can be used to
identify the high points and low points of the dent,
providing the auto mechanic with information to
determine where to pound and where to pull on
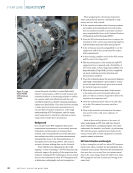
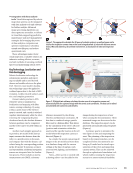
the dent. A more sophisticated approach involves
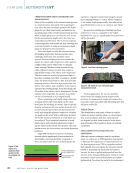
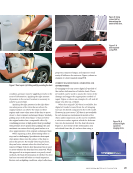
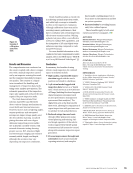
using the dent depth information to calculate the
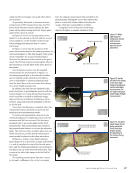
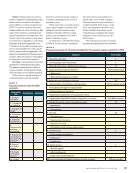
dent strain (Figure 12). Relieving the dent strain is
a key part of the PDR process. Deriving dent strain
maps from the 3D data facilitates a digital workflow
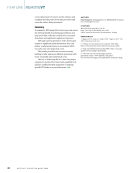
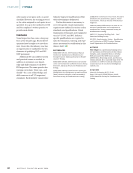
for dent repair. Figure 12 illustrates the locations of
strain in a dent along with the dent depth.
3D data on a dent can also be used to generate
strain maps, offering more precise guidance on
where to pound or pull to restore the body panel
to its original shape. Additionally, utilizing 3D data
enables the identification of when the dent has
been successfully repaired. This approach intro-
duces a mathematical metric for determining dent
repair, promoting better consistency among techni-
cians and across various vehicles, taking the guess-
work out of dent repair.
FEATURE
|
AUTOMOTIVEVT
Figure 11.
Deformation
calculation for
the dent shown
in Figure 10.
1000
800
600
400
200
0
0 200 400 600
x (mm)
5.0
4.0
3.0
2.0
1.0
0.0
Compression Compression
Tension
Internal
1000
800
600
400
200
0
0 200 400 600
x (mm)
4.4
3.3
2.3
1.3
0.2
0.8
–1.9
Tension Tension
Compression
External
Figure 12.
Locations of strain
in a dent: (a) dent
depth (b) dent
strain.
Negative camber Positive camber
Toe in Toe out
Negative caster Positive caster
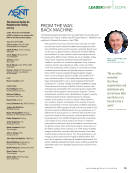
Figure 13. Vehicle alignment parameters: (a) camber
(b) toe (c) caster.
30
M A T E R I A L S E V A L U A T I O N • J U L Y 2 0 2 4
Depth
(%)
Strain
(%)
y
(mm)
y
(mm)


