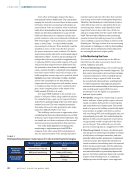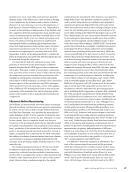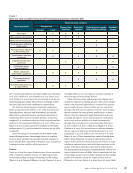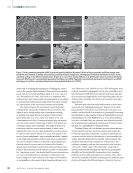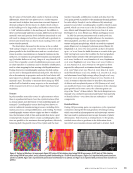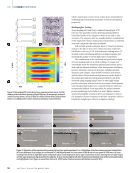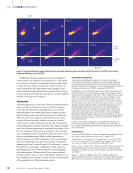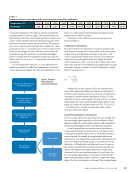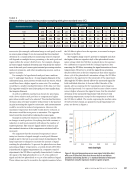
Some other technologies inspect the depos- ited material between build layers. This can include imaging the as-built or recoated layer in laser powder bed fusion. Most layer monitoring technologies are camera based. Some use machine vision to automat- ically detect abnormalities in the deposited material. Others use laser line profilometry to scan over the build and characterize its roughness and any unex- pected variations. Some more advanced methods use NDE technologies—such as ultrasonics, eddy current array, or even X-rays—to scan for defects inside previous layers of the part. These methods would be classified as active, in the sense that they monitor the system response to some excitation. The distinc- tion between passive and active in situ monitoring is delineated in Table 1. Active in situ monitoring tech- nologies have the most potential for supplementing or replacing NDE for inaccessible regions of the part. Any process that inspects between build layers has the potential to slow down the build process signifi- cantly, and this should be considered when planning how these sensors will be used. Full coverage of the build using these sensors may not be practical, which highlights one major advantage of using a multiple sensor suite. Anomalies in one data stream can trigger more focused inspection with another sensor, or continuous data streams can be synchronized to give a more complete picture of the nature of the build anomaly (Petrich et al. 2021). One major NDE challenge is the as-built com- plexity of AM parts. When using traditional subtrac- tive manufacturing, a part can be inspected before and between manufacturing steps to provide oppor- tunities for access. The very complex geometries that make AM a good value proposition also make inspection difficult (Waller et al. 2014). This challenge can become an opportunity when considering the layer-wise fabrication process of AM. If the part can be inspected between build layers, this can enable an even better evaluation of the internal structures and any potential defects that may form. One of the main limitations of using in situ monitoring to supplement post-build NDE is temporal. Even when using NDE technologies in situ, the characterization of the already-deposited material cannot take into effect how that material may change as the result of subsequent deposition. Therefore, the finished part could include cracks or other defects that were not captured in the in situ monitoring data. Another major limitation is that inspections between layers take time, which can add up to a large delay over the course of the entire build. The most time-efficient in situ monitoring systems monitor the build in-process, but it is diffi- cult to establish a causal correlation to defects in the finished part. The large volume of in situ monitoring data presents a challenge not only for data handling and storage, but for interpreting which indications are meaningful indicators of part quality. In Situ Monitoring Use Cases Use cases for in situ monitoring can be differen- tiated by how the data is processed, stored, inter- preted, validated, and used. Process Monitoring: Using in situ monitoring for process monitoring is the standard approach. The data can be processed to give real-time warnings of unusual signatures, which could help inform a decision to stop or repair a build. It can also be recorded and referenced later, enabling build- to-build comparisons. This approach increases awareness and understanding of the build process, and can help guide targeted NDE, but does not attempt to use the signals as a quantitative indicator of part quality. Part Quality: Using in situ monitoring as a quan- titative indicator of part quality requires a known causal correlation between the monitoring data and actual defects in a finished part. This would need to be proven by building a statistically signif- icant number of samples with defects, and not only correlating NDE and metallography data sets as mentioned previously, but understanding the physics of why a process signature or layer moni- toring anomaly would correspond to the defect seen in the part. This enables the use of in situ process monitoring data as a supplement to NDE. Closed-Loop Control: For many, the ultimate goal of in situ process monitoring is the ability to monitor a build, detect and interpret anomalies, and auto- matically adjust machine parameters or implement corrective actions. This requires the same known causal correlation of monitoring data to the material defects mentioned previously, with the added step of understanding how changing machine parame- ters can heal the defect or proactively improve the process. The NASA certification framework currently requires a locked build process, so certifying an adaptive process would require a new approach. FEATURE | INSITUMONITORING T A B L E 1 Distinguishing between major types of in situ monitoring technologies Monitor during build process Inspection between build layers Passive (no external excitation) Infrared/near infrared Visual Melt pool monitoring Laser profilometry Active (added excitation) – Ultrasonic X-ray 26 M A T E R I A L S E V A L U A T I O N • A P R I L 2 0 2 2
ASNT grants non-exclusive, non-transferable license of this material to  .
All rights reserved. © ASNT 2025. To report unauthorized use, contact: customersupport@asnt.org

