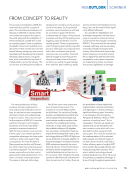
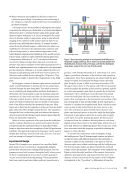
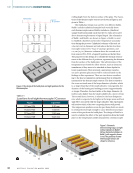
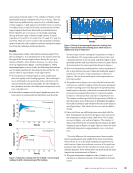
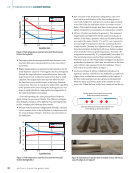
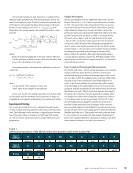
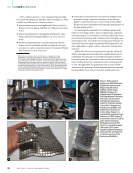
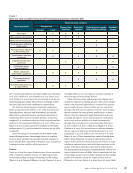
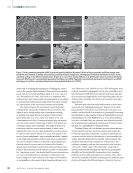
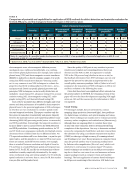
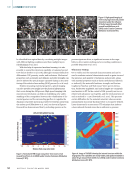
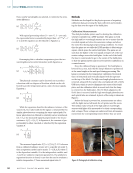
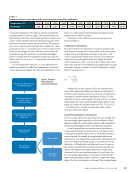
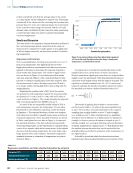
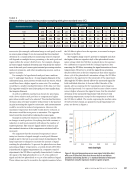
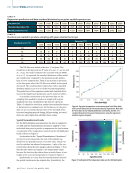
the steep thermal gradients and rapid solidification (Quintana et al. 2020 Saville et al. 2021 Kamath et al. 2021 Kunze et al. 2015 Dinda et al. 2012 Song et al. 2014), though it can be con- trolled through processing. The presence of periodic texture has been linked with some challenges in inspectability. The final two broad categories, materials composition (both average and local) and the “rest” of the microstructure (typically phases, their size and distribution) are critically important to setting the baseline mechanical properties of engineering alloys (such as strength, ductility, and fracture toughness). At a minimum, there are local compositional fluc- tuations in AM components (Kenney et al. 2021 Collins 2004 Hayes et al. 2017), which can lead to variations in the elastic stiffness tensor (Cij), and thus should be relevant for the NDE community. These five categories of variables are described briefly in the following sections. Interestingly, there is a coupling between these variables that provides potential strategies to better identify them using NDE techniques. Some examples of coupling between variables will be introduced. Defects There are at least five types of macroscopic defects associated with a volumetric variation of some sort: spherical porosity, LOF porosity, balling, cracking or hot tearing, and fish scaling (Zhou et al. 2015 Tammas-Williams et al. 2015 Pogson et al. 2004 Sochalski-Kolbus et al. 2015). Figure 2 provides examples of these four types of macroscopic defects. Often and erroneously, spherical porosity (Figure 2a) is assumed to indicate an existing gas pore. The correct interpre- tation is that the pore formed when it consisted of a gaseous species inside the pore. However, there are two sources for such gas. The first source is gaseous elements, such as argon, that are contained in some powder particles prior to depo- sition or that are captured by liquid dynamics from the sur- rounding atmosphere. These elemental species will remain in the pores and are unlikely to be healed permanently through other post-deposition processing steps (Kenney et al. 2021 Collins et al. 2016 Collins 2004 Zhang et al. 2019a Chlebus et al. 2015). The second source is alloying elements that are vaporized and create a keyhole (Kenney et al. 2021 Hojjatzadeh et al. 2019 Collins et al. 2016 Petrov et al. 1998 King et al. 2014). These elements have surface Rayleigh insta- bilities whose dynamics can result in spherical pockets of vapors of the constituent metal elements that behave as a gas, resulting in spherical pores, and which then condense on the surface of the pore, leading to a pore that is under vacuum. The thermophysical properties, including density, of these two types of spherical pores will differ. There is emerging work that is using high-energy X-rays to image experiments that emulate powder bed systems to study the origins of these defects (Menasche et al. 2021 Xavier et al. 2020 Jop et al. 2020), while T A B L E 1 Materials state variables linked to different physical processes related to AM Physical process Materials state variables Composition Phases (size, fraction) Grain size/ texture Defects (pores, cracks, lack of fusion, balling) Residual stress Average Local Heat input X X X Macroscopic heat transfer X X Materials thermodynamics X X Fluid dynamics within the molten pool X Fluid processes adjacent to the molten pool X X X Liquid/vapor interface processes X X X X Liquid/solid interface processes X X Solid-state phase transformations X X X Elastic and plastic deformation, gradients X X X X X Thermomechanical gyrations X X X Euclidean deposition (i.e., G-code) effects X X X A P R I L 2 0 2 2 • M A T E R I A L S E V A L U A T I O N 49
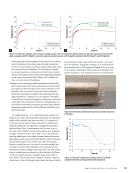
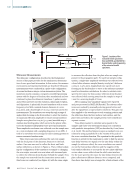
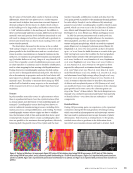
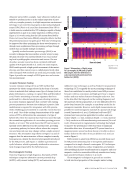
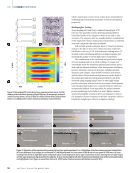
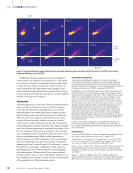
other work is studying the importance of Marangoni convec- tion on the capture and retention of these particles in molten pools with an extended tail (Hojjatzadeh et al. 2019 Gan et al. 2017 Khairallah et al. 2016). Such work is in alignment with evidence that raster scan powder bed strategies are more likely to contain these spherical pores that arise from alloy constitu- ent vaporization, while spot-scan strategies are less likely. LOF defects (Figure 2b) are features caused by partial melting of the material by insufficient heat and can be clas- sified by poor overlap within layers, inadequate wetting, or shallow melt pools that do not interact with previous layers (Polonsky et al. 2020 Calta 2019 Martin et al. 2019 Cunningham et al. 2019). Scanning strategies play an import- ant role in the creation of this type of defect. LOF defects are common in linear raster strategies, especially in those loca- tions when the heat source reduces speed to make turns, making the zones near the edges particularly common places to observe these defects (Zhou et al. 2015). This points to the need to better understand—and potentially measure—signals of the depth of penetration of the molten pool, as opposed to the current method, which is commonly a preprogrammed function related to power and acceleration/deceleration speeds. Such information would better represent the process physics. The formation of LOF defects can also be responsible for “turbulence events” that hinder fluid flow and can promote even more heterogeneities in chemistry. Furthermore, the local cooling rates can be related to the shape of LOF defects or be identified as the cause of their formation (Kenney et al. 2021 Bayat et al. 2019 Wolff et al. 2017). NDE techniques, such as X-ray computed tomography, can be very powerful tools to first determine if LOF defects are present in the part and also their location and approximate sizes, depending upon the res- olution of the technique, the depth of penetration, and other shape factors. Excessive heat can form other defects such as those asso- ciated with the “balling phenomenon” (Figure 2c) in which liquid droplets of metal are ejected from the melt pool, cool rapidly, and then land on the melt pool (potentially becoming incorporated) or other regions of the part (Khairallah et al. 2016 Gunenthiram et al. 2018 Haghdadi et al. 2021). These droplets, once they cool and if they are captured, may effectively modify the local properties (topological, mechanical, chemical, texture, thermal, etc.) and influence subsequent layers. Cracking (Figure 2d) is a dynamic process where the rates of heat transfer and the concurrent stresses and strains due to thermal expansion/contraction, or phase transformations, compete with the ability of the material to accommodate the strains, typically defined by the ductility of the material. The problems associated with cracking are well known in the welding community and are often associated with concepts such as the “brittle range” (the temperature range that a material will still have strength but without any measurable ductility) and the nil ductility temperature. Such cracking problems exist for AM materials for two reasons. First, AM is effectively a spatially controlled welding process, with the same physics, although with different degrees of severity. Second, ME | AMNDEOVERVIEW 20 μm Welding direction 150 μm 300 μm 100 μm 20 μm 20 μm Melt flow Figure 2. Defects commonly observed in AM: (a) spherical porosity (indicated by arrows) (b) lack of fusion caused by insufficient energy input to melt the stock material (c) balling (d) hot tearing caused by excessive energy input, creating ejecta of material and thermal stresses and (e) and (f) fish scaling, at two different magnifications. (Figure 2a is reused from Tammas-Williams et al. [2015] under Creative Commons Attribution License (CC BY) Figure 2c is reprinted with permission from Zhou et al. [2015] Figure 2d is reprinted with permission from Pogson et al. [2004] and Figures 2e and 2f are reprinted with permission from Sochalski-Kolbus et al. [2015]). 50 M A T E R I A L S E V A L U A T I O N • A P R I L 2 0 2 2
ASNT grants non-exclusive, non-transferable license of this material to  .
All rights reserved. © ASNT 2025. To report unauthorized use, contact: customersupport@asnt.org


