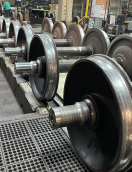
In North America, railcar axles are classified
based on the approximate weights of the cars as
defined in the Association of American Railroads
(AAR) Manual of Standards and Recommended
Practices (MSRP) Section G: Wheels and Axles (2022).
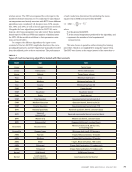
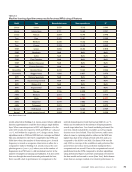
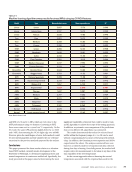
Table 1 shows the standardized AAR axle designs
and recommended load ratings for freight and pas-
senger car axles.
Failure of railway axles is typically attributed to
fatigue crack initiation and propagation phenomena.
In addition, nonmetallic inclusions from manufac-
turing and surface damage incurred during handling
or while in service can accelerate axle fatigue. The
effect of surface damage (e.g., dents, gouges, ballast
impacts) in the axle body, and fretting from corrosion
pits under the backing ring or near the wheel seat,
create stress risers that provide sites for fatigue initia-
tion. The mileage, tonnage, and environmental con-
ditions in which railcars operate all have cumulative
effects on fatigue resistance and crack propagation.
Several previously published reports and literature
have detailed the premature failure of axles attributed
to slow fatigue crack growths across the body and
journal fillet areas of the axle (Hoddinott 2004
Lonsdale and Stone 2004 TSB 2001, 2004, 2007, 2018,
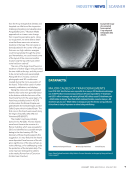
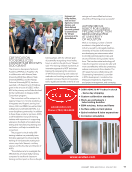
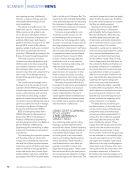
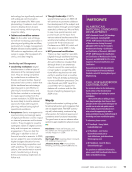
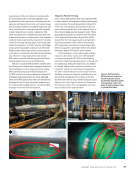
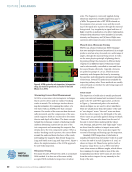
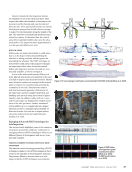
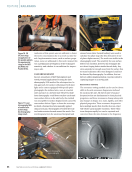
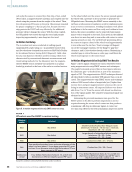
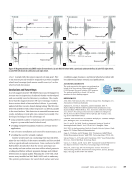
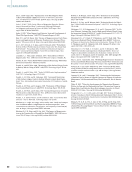
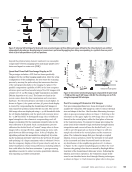
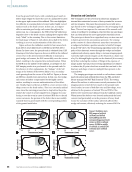
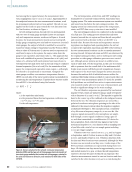
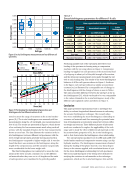
2019). Figure 2 shows fatigue-initiated broken axles.
Timely detection and characterization of axle
indications are vital to ensuring the structural integ-
rity of wheelsets used in rolling stock. This structural
integrity is an essential aspect of safe and economi-
cal railroad operation, with implications for both the
railroads and their customers. Therefore, conducting
NDE inspections on moving trains in an in-service
environment in order to detect fatigue cracks on
railway axles would be least disruptive to operations.
Railcar Axle Inspection Technologies
Railcar axles undergo various inspections to ensure
their structural integrity and safe operation. The
specific inspection methods will vary depending
on the type of inspection being conducted and the
FEATURE
|
RAILROADS
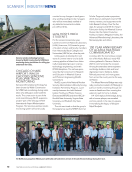
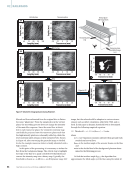
Wheel
Bearing
Backing ring Axle body
Press seats
Rail
Wheel seat
Journal seat
Tapered end
Journal fillet
Transition radius
Dust guard seat
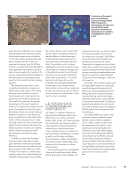
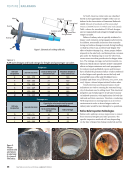
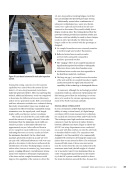
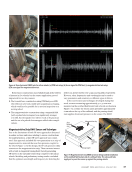
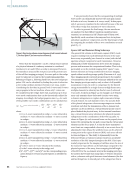
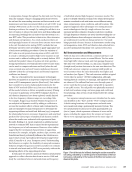
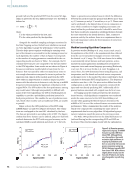
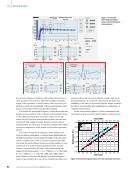
Figure 1. Schematic of a railway solid axle.
Figure 2.
Fatigue-
initiated solid
axle failures:
(a) axle body
(b–c) journal
fillet radius.
T A B L E 1
AAR axle designs and load ratings for freight and passenger car axles
Freight cars
AAR axle
designation Journal size (mm) Load carried by each
axle (metric ton)
Maximum weight on
railcar (metric ton)
E 152 × 279 24 100
F 165 × 305 31 130
G 178 × 305 34 143
K 165 × 229 31 130
L 152 × 203 24 100
M 178 × 229 34 143
Passenger cars
AAR axle
designation Journal size (mm)
Capacity for axles (metric ton) for normal
maximum operating speeds of:
Up to and including
137 kph 138 to 161 kph
D 140 × 10 16 15
E 152 × 279 20 19
F 165 × 305 24 23
28
M A T E R I A L S E V A L U A T I O N • J A N U A R Y 2 0 2 4
2401 ME January.indd 28 12/20/23 8:01 AM


