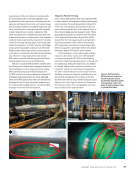
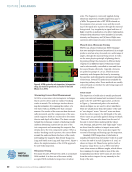
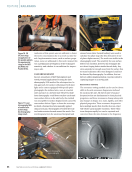
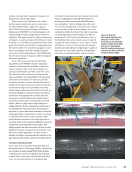
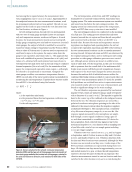
resolution of this system was not sufficient to detect
the stress concentration due to a notch cut into the
axle. Implementation issues, such as surface prepa-
ration, were not addressed in this work instead, this
was a preliminary investigation of the technique’s
sensitivity and whether it was sufficient for inspect-
ing an axle.
LASER SHEAROGRAPHY
In 2016, researchers at MxV Rail explored and
tested potential applications for using the laser
shearography NDE method for axle inspection. In
this approach, the surface is illuminated with laser
light, and a camera equipped with special optics
photographs the surface twice, once at a neutral
state and once at a stressed state. However, while
laser shearography could detect surface cracks and
near-surface defects in the axle body, the method
was susceptible to surface displacements caused by
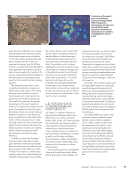
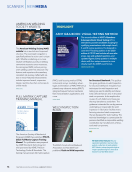
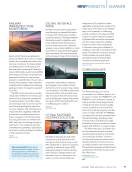
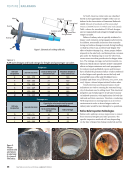
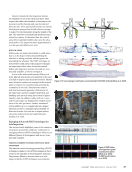
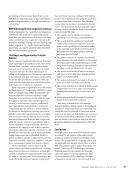
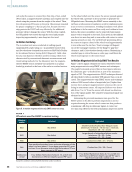
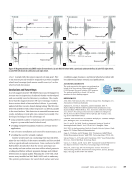
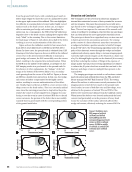
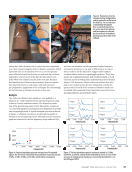
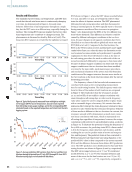
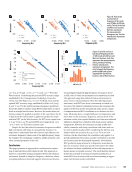
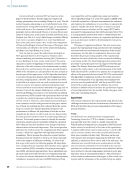
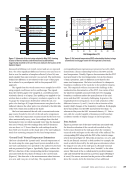
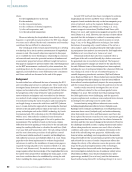
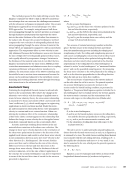
near-surface defects. Figure 11 shows the test setup
in which a thermal load was manually applied
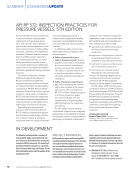
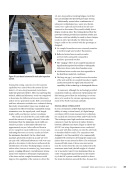
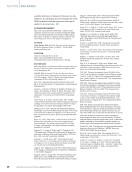
using a heat gun. Shearography revealed the local-
ized surface strains formed around the notch. The
interferograms from the unstressed (original) and
stressed states (after thermal loading) were used to
calculate the phase map (the first derivatives of out-
of-plane displacements). The notch was visible in the
shearography result. The sensitivity for near-surface
defects was excellent however, this technique did
not detect forging defects inside the axle body. Any
stress anomaly far enough away from the surface that
its strain localization effect was dissipated could not
be detected by shearography. In addition, this test
did not address implementation concerns related to
capturing images on a moving axle.
RESONANCE TESTING
The resonance testing method can be used to detect
shifts in the axle resonance frequencies induced
by cracks in the axle. All objects have resonance
frequencies that are fundamental to their physical
properties, and these resonances change along with
any changes in shape, size, mass, rigidity, and other
physical properties. These resonance frequencies
have multiple modes that describe how an object
will vibrate upon impulse excitation. These vibra-
tions dissipate rapidly but can be captured and
converted from the time domain to the frequency
FEATURE
|
RAILROADS
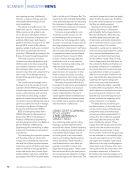
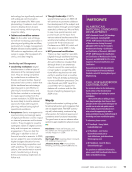
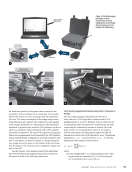
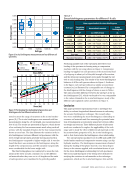
Figure 10. 3D
DIC test setup:
(a) application of
the speckle pattern
(b) experimental
setup in the FAST
pit (Witte and
Poudel 2016).
Axle
EDM notch
Camera
Tripod Laptop
Notch
White paint
marker
Heat gun
Axle
Laser shearography
camera and optics
Figure 11. Laser
shearography NDE
of cracked axle:
(a) test setup
(b) shearography
image result.
34
M A T E R I A L S E V A L U A T I O N • J A N U A R Y 2 0 2 4
2401 ME January.indd 34 12/20/23 8:01 AM


