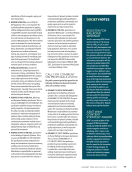
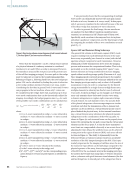
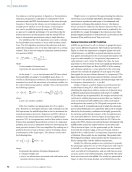
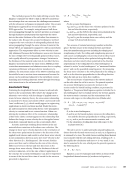
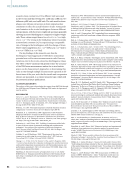
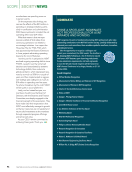
(5) σ = B − B0 _
m1
Equation 5 relates the longitudinal thermal stress in rails
(σ) with the measured acoustic birefringence (B). The param-
eter m1 is the stress-birefringence constant, which represents
the slope obtained experimentally between the measured
birefringence and the applied longitudinal stresses. The in situ
birefringence (B0) of the rail under study can be obtained from
Equation 2 when the rail is in a stress-free state. The experi-
mental results presented in this paper characterize the mag-
nitude and potential variation of these two key acoustoelastic
constants for rail materials.
Experimental Details
Experiments were conducted in three different test regimes.
First, testing was conducted to measure rail steel’s acoustic
birefringence-stress relationship for both tension and com-
pression stresses. Second, unstressed rail segments of differ-
ent weights and manufacturing history were tested to assess
the stress-free birefringence, B0. Third, short rail segments
were tested in compression to assess the variation in the
stress-birefringence relationship between rail of different
weights and manufacturing histories. This section describes
the instrument and equipment used for the testing, geometry,
and machining of the specimens tested during this research
portion.
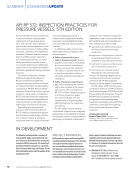
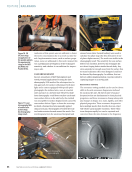
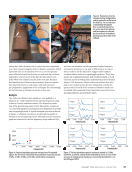
The EMAT system generates and detects polarized shear
waves and is connected to a portable enclosure containing a
pulser-receiver, signal conditioner, data acquisition system,
wireless router, a rechargeable battery for field operations, and
encoders to support field measurements (Figure 1). The EMAT
pulser-receiver includes a customized external multiplexer that
supports the research application of the device. This system
was initially designed for stress measurement in highway
bridges (Washer et al. 2017).
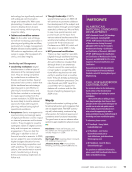
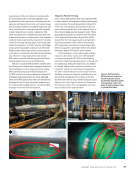
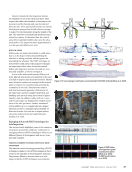
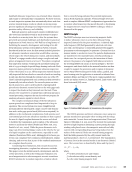
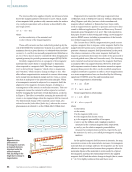
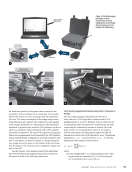
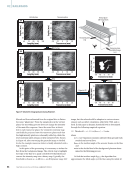
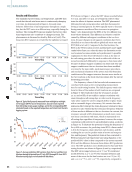
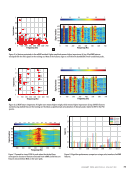
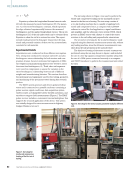
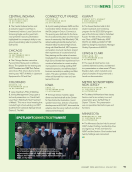
The test setup shown in Figure 1 was used to perform the
tensile and compressive loading on the machined rail spec-
imens for the first set of testing. The test setup consists of
a 220-kip loading machine that is capable of applying both
tensile and compressive forces, a computer with LabVIEW
software to control the load application, a signal conditioner
and amplifier, and the ultrasonic stress system (USM), which
powers an EMAT sensor with a fixture to control the sensor
rotations to the rail rolling and perpendicular orientations.
The second set of testing for the in situ birefringence study
required using the ultrasonic measurement system only, without
any loading machine, since the ultrasonic measurements were
taken from the rail specimens in the unloaded state.
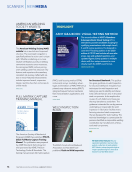
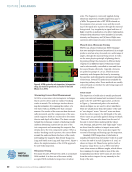
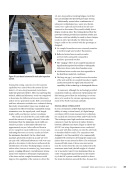
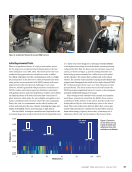
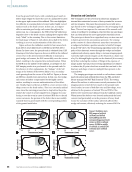
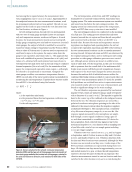
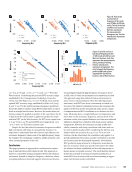
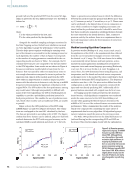
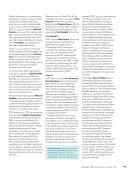
The third set of testing of the stress-acoustic constant was
performed using the test step shown in Figure 2 and included
the use of a 600-kip capacity compression machine along with
the use of a USM system connected remotely to a computer
and EMAT transducer to perform the measurement and collect
the data.
Rail
specimen
USM system
Signal
conditioner
and amplifier
PC with
LabView
software
220 kips
MTS loading
machine
EMAT
sensor
Figure 1. Test setup for
tensile and compressive
loading of the first set of
testing.
Figure 2. Test setup for the stress-acoustic parameter study for different
rails.
ME
|
RAILROADS
82
M A T E R I A L S E V A L U A T I O N • J A N U A R Y 2 0 2 4
2401 ME January.indd 82 12/20/23 8:01 AM


