the stress-birefringence behavior. Three different locations on
each specimen were tested to check the variation along the
length of the specimen. At each location, three tests were per-
formed to check the repeatability of the measurements, result-
ing in a total of nine tests for each load increment.
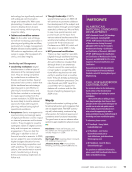
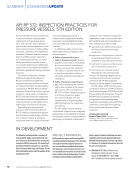
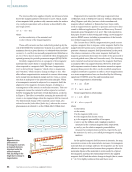
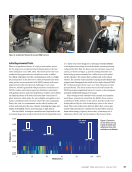
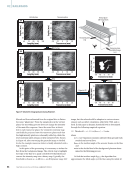
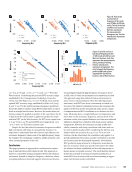
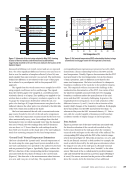
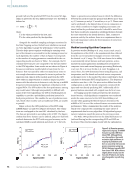
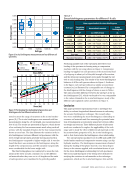
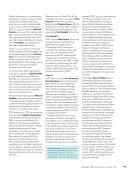
The results are presented in Figure 5, which shows the bire-
fringence measurement on the ordinate and the applied stress
on the abscissa. Data points on the plot represent average
values for each load increment stemming from the nine tests
conducted. The sample standard deviation of these data is
represented by the error bars. In the plot, positive stress values
represent compression, while negative stress values represent
tension.
It is observed that the birefringence-stress behavior for
both specimens maintained a constant linear relationship in
all different positions tested along the length of the specimen
with a correlation factor (R2) of over 99%. Figure 5 also illus-
trates that the methodology showed good repeatability in tests
conducted. It is worth mentioning that the stress-acoustic
constant, represented by the slope of the relationship, was
similar for both specimens: 7.9 × 10⁻⁶/MPa (5.5 × 10⁻⁵/ksi) and
8.2 × 10⁻⁶/MPa (5.6 × 10⁻⁵/ksi) for 141RE and 136RE, respec-
tively. However, they showed different in situ birefringence
values, represented by the zero-stress crossing since they were
machined from rail sections of different weights and manu-
facturing histories. It can also be observed in the figure that
variability in the data, as represented by the sample standard
deviation, was generally more significant in compression as
compared with tension.
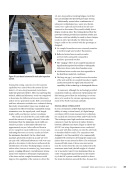
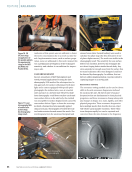
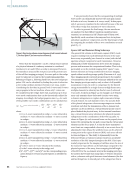
In the second testing phase, 4-ft-long unmachined rail
specimens with as-received original surface conditions were
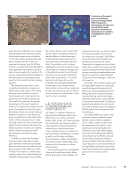
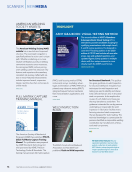
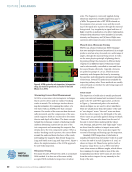
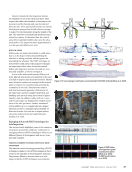
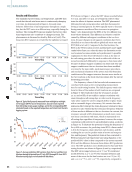
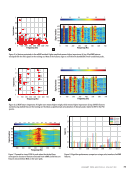
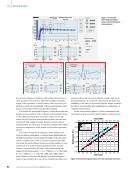
Figure 4. Screenshot
of the data-processing
software for birefringence
measurements.
50 40 30 20 10 0
Stress (ksi)
–10 –20 –30 –40 –50
345 276 207 138 69 0
Stress (MPa)
–69 –138 –207 –276 –345
–0.20%
–0.10%
0.00%
0.10%
0.20%
0.30%
0.40%
R2 =0.9992
R2 =0.9991
136RE
141RE
Linear (136RE)
Linear (141RE)
Figure 5. Stress-birefringence behavior for two machined specimens.
ME
|
RAILROADS
84
M A T E R I A L S E V A L U A T I O N • J A N U A R Y 2 0 2 4
2401 ME January.indd 84 12/20/23 8:01 AM
Birefringence
(B%)


