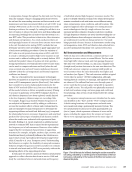
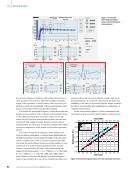
wire. When an alternating current passes through
the induction wire, which is placed next to the
conducting material, the current is induced in the
material and flows through the surface layer due to
the skin effect. When a discontinuity is encountered
in the path of the current flow, it causes a potential
drop in the region of the axle with the discontinuity.
Detecting and measuring this drop is the main idea
behind the ICFPD technique, which was developed
to detect fretting fatigue cracks in the wheelset of a
high-speed train. Reportedly, the ICFPD technique
can detect cracks 1.5 and 2.0 mm deep in a press-fit
railway axle at a scanning line 5 and 10 mm away
from the pick-up pins without having to remove
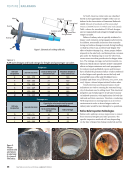
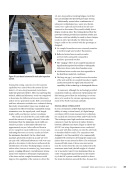
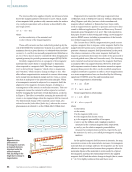
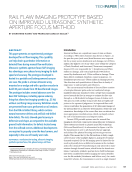
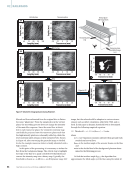
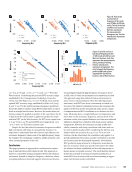
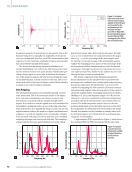
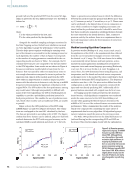
the wheel from the axle (Figure 7) (Kwon and Shoji
2004).
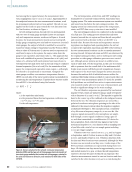
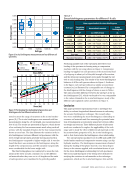
ALTERNATING CURRENT INFRARED THERMOGRAPHY
The alternating current (AC) infrared thermogra-
phy technique applies infrared thermal imaging
technology to detect and analyze temperature vari-
ations resulting from the local heating that occurs
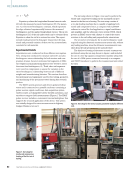
along the discontinuity when a high-frequency AC
is passed through a part or component of interest.
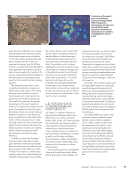
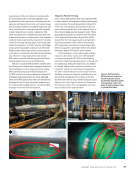
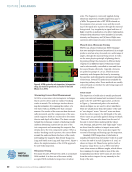
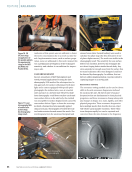
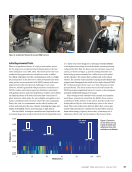
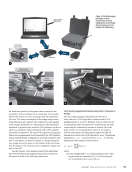
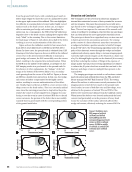
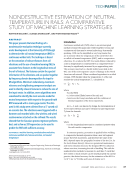
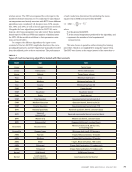
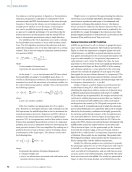
This approach was investigated by TWI, as shown
in Figure 8, under the support of the Whole Life Rail
Axle Assessment and Improvement (WOLAXIM)
consortium (Rudlin et al. 2012 Tian et al. 2005).
Although this technique looks promising, it suffered
technical difficulties during its implementation
phase and thus cannot be used to inspect the area
underneath the wheel seat and bearings.
LASER AIR-COUPLED ULTRASOUND
In 2004, researchers at MxV Rail (formerly TTCI)
developed an automated axle inspection system
that uses high-powered laser ultrasound (Morgan
et al. 2006) to detect the presence of fatigue
cracks in railcar axles. The goal of this research
was to develop a prototype wayside detection
system that automatically inspects railcar axles
for surface-breaking cracks. The prototype system
used a high-powered laser to generate ultrasonic
waves in the axle body and used air-coupled trans-
ducers to receive ultrasonic signals. Six axles were
tested during the early proof-of-concept (POC)
demonstrations in laboratory settings. The defects
in the test axles represented both in-service gen-
erated cracks and machined (EDM) notches. The
axles were positioned over the laser-illuminat-
ing zone and wheelsets were rolled by at walking
speeds. After the POC demonstration, 87.8% of the
defects were correctly identified, with only one false
positive. It was also determined that cracks farther
from the center of the axle body were more chal-
lenging to detect.
The initial design of the field inspection system
was installed at the Facility for Accelerated Service
Testing (FAST) in Pueblo, Colorado, and tested
through 2005. The system was designed to auto-
matically interrogate one-third of the axle with
prototype data acquisition and signal processing
software. This system again showed positive results
using the same test axles that were used in the POC
demonstration. Based on the test results from the
initial prototype, design efforts focused on improv-
ing the system’s capability and expanding the ability
of the system to inspect all axles of a passing railcar.
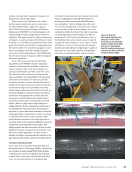
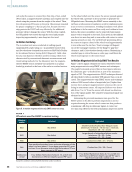
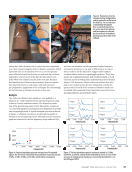
Figure 9 shows a photo of the installed system at
FAST, which can inspect the entire axle body during
a full-wheel revolution. Additional test axles were
provided for the testing of the improved prototype.
FEATURE
|
RAILROADS
3
40
Sensor
Axle Wheel
Potential
drop
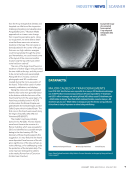
Figure 7.
Schematic
of the ICFPD
measurement
system for railway
axles (Kwon and
Shoji 2004).
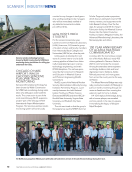
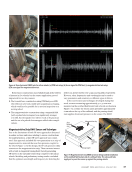
Figure 8. AC infrared
thermography
for railway axle
inspection: (a) test
setup (b) indication of
a warm wire on an axle
(Rudlin et al. 2012).
32
M A T E R I A L S E V A L U A T I O N • J A N U A R Y 2 0 2 4
2401 ME January.indd 32 12/20/23 8:01 AM
40


