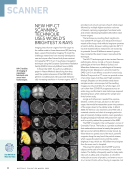
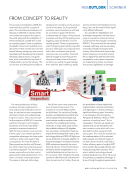
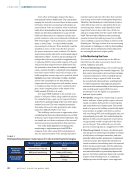
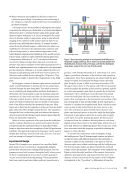
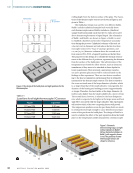
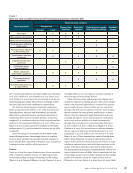
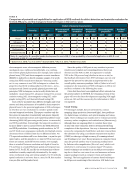
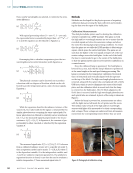
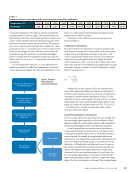
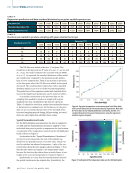
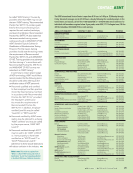
electromagnetic wave, electromagnetic diffusion process, mechanical wave, visible and invisible light, or a combina- tion of those physical phenomena (for example, laser induced phased array [LIPA] and electromagnetic acoustic transducer [EMAT]) to indirectly or directly examine samples. It is worth noting that NDE is much more than just “detecting cracks,” as it is very common to use NDE techniques to evaluate the properties of perfectly working subjects at the micro-, meso-, and macroscale. Based on specific physical processes and principles, NDE techniques can be broadly divided into six modalities: visual testing (VT), ultrasonic testing (UT), acoustic emission testing (AE), electromagnetic testing (ET), radio- graphic testing (RT), and thermal/infrared testing (IR). Each of these modalities has different strengths and weak- nesses, and their performance is bounded by their respective physical basis. In the potential application of NDE techniques in AM, there are two resolutions to consider: spatial resolu- tion and temporal resolution. This paper considers only the first, given its immediate translatability and greater disparity between the materials science and engineering/additive man- ufacturing (MSE/AM) processing needs (micro- to mesoscale) and NDE possibilities. Interestingly, the temporal resolution is far more likely to have a match between the MSE/AM needs and NDE possibilities. Considering spatial resolution, for VT and UT (both wave propagation methods), the Rayleigh criteria determines their resolution limit due to diffraction limits. For VT, expected resolution will be no better than ~0.2 μm for opti- mized optics, and this number is 0.2 mm for UT in most cases. There are intrinsic tradeoffs between metrics. For example, there is a tradeoff between resolution and depth of focus for VT, and there is a tradeoff between spatial and temporal reso- lution for UT. For ET, RT, and IR, the resolution limit of these modalities is mainly empirically determined by the equip- ment, mechanical setup, and testing samples. For ET methods, spatial resolution is no better than 0.2 mm for IR, this number is 20 μm (Ida and Meyendorf 2019). Since the quality of AM parts is very sensitive to process windows and complex and competing physics, there is an obvious need for NDE on AM. It is imperative to include NDE in the AM process loop (whether in situ or ex situ) so that feedback information from NDE techniques can not only improve the process but also play an important role in the overall quality assurance paradigm. Table 2 (Taheri et al. 2017) summarizes the matureness of NDE techniques on AM in 2017 and their evolution in the following four years. Given that there have been significant efforts extended on the general subject of AM NDE, the remaining section of this paper will cover the latest developments regarding NDE appli- cation on AM, and the reasons why the information in Table 2 was updated. Visual Testing VT techniques include, but are not limited to, contour mapping, fringe projection (structured light), laser profilome- try, digital image correlation, and optical imaging and tomog- raphy. These techniques are mainly used to evaluate geometric accuracy, surface roughness, and residual stress (Sharratt 2015), although there are ongoing efforts to correlate these types of data with other volumetric defects determined following completion of the depositions. One way to determine residual stresses by comparing the build before and after removal from the substrate is by using a coordinate measurement machine (CMM) or other type of high-accuracy 3D scanning technol- ogy (Denlinger et al. 2014). Recent progress in computer vision may also provide another way of measuring residual stress by Eulerian video magnification (Wu et al. 2012), which is rel- atively low in cost because it is camera based. VT (camera based) techniques are useful for in situ AM process monitor- ing due to their low cost, ease of use, and numerous software support packages (such as computer vision and machine learning). The basic application of camera-based techniques in AM process monitoring is flaw detection. LOF defects can T A B L E 2 Comparison of potential and capabilities for application of NDE methods for defect detection and materials evaluation for finished AM parts, and the changes to these techniques in the last four years NDE method Defect of material characteristics Porosity Crack Microstructural anomalies Geometrical anomalies Mechanical properties Electromagnetic properties Residual stress 2017 2021 2017 2021 2017 2021 2017 2021 2017 2021 2017 2021 2017 2021 Visual C B1 C B1 A A N B2 N N B3,4 Ultrasonic A A A B A N B Electromagnetic B A D B N A C Radiography A A C A N N A Thermal/infrared D B5 B D B N N N Note: A = applicable B = possible/needs development for use in AM C = low probability of successful application to AM D = not applicable to AM N = not applicable 1 Gobert et al. 2018 2 Lu et al. 2019 3 Sharratt 2015 4 Wu et al. 2012 5 McNeil et al. 2020 A P R I L 2 0 2 2 • M A T E R I A L S E V A L U A T I O N 53
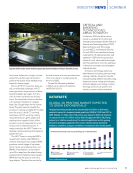
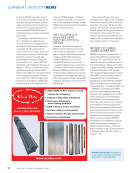
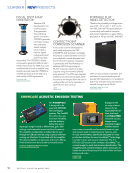
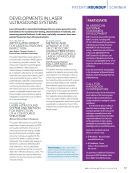
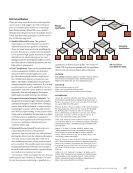
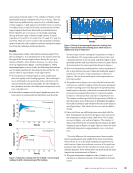
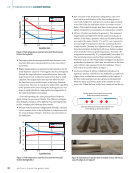
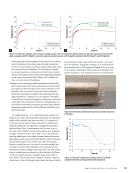
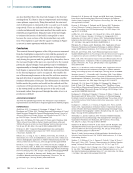
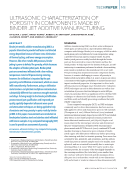
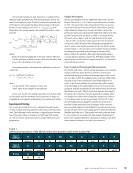
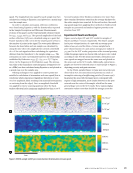
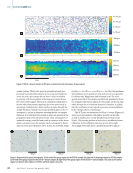
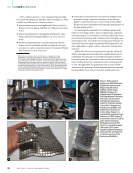
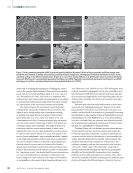
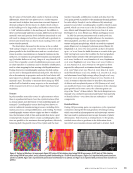
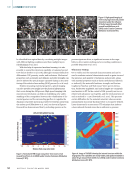
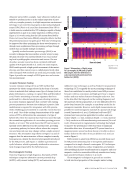
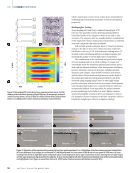
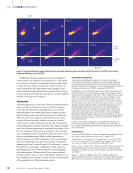
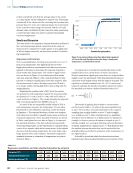
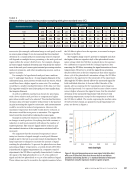
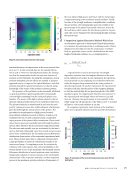
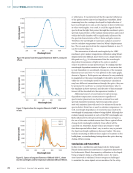
be identified from optical data by correlating multiple images with different lighting conditions and from multiple layers (Abdelrahman et al. 2017). With the help of supervised machine learning, it is also possible to extend the detection capability of cameras beyond LOF defects (Gobert et al. 2018), although it remains difficult to differentiate LOF, porosity, cracks, and inclusions. Mechanical properties such as density and ultimate and yield strengths can also be inferred by optical images captured during in situ mon- itoring of the selective laser melting (SLM) process (Lu et al. 2019). Besides measuring material properties, optical imaging can also provide new insight into the physical phenomena that occur during the AM process. High-speed imaging with microsecond resolution can help in establishing new under- standings of the competition between the volatilization of ele- mental species and the surrounding gas flow to regulate the dynamics of powder motion in powder bed systems away from the molten pool (Matthews et al. 2016), as shown in Figure 4. Research has demonstrated that by including spatters as the process signature driver, a significant increase in the capa- bility to detect under-melting and over-melting conditions is possible (Repossini et al. 2017). Ultrasonic Testing UT is widely used for materials characterization and can be used to evaluate material characteristics such as grain size and the presence and quantity of inclusions and porosity, along with material properties such as elastic modulus and (directly or indirectly) the material’s hardness, strength, and fracture toughness (Nanekar and Shah 2003). Wave speed, attenua- tion, backscatter amplitude, and critical angles are commonly used metrics in UT. In the context of AM, porosity can be cor- related with ultrasonic wave speeds, and the resolution limit of such a method is ~0.5 (Slotwinski et al. 2014). This presents certain difficulties for the materials scientist, where accurate measurement of porosity fractions below 0.5 may be desired. Laser ultrasound is a noncontact UT technique that induces a laser-induced thermal stress that is sufficient to generate 100 μm +0 μs +0 μs +66 μs +132 μs +200 μs +200 μs 100 μm 100 μm 100 μm 100 μm 100 μm Figure 4. High-speed imaging of melt track progression and powder movement under the influence of the hot vapor Bernoulli effect (reused from Matthews et al. [2016] under Creative Commons Attribution License [CC BY]). Distance from array center (mm) LIPA at 3 MHz with XCT overlay AM component Build plate XCT center XCT area Indication area 0 –1 –2 –3 –4 –5 –6 –7 –8 24 20 16 12 8 4 0 –20 –15 –10 –5 0 5 10 15 20 Figure 5. Normalized TFM image using shear–shear wave arrival (reused from Pieris et al. [2020] under Creative Commons Attribution License [CC BY]). ms–1 3400 3300 3200 3100 3000 2900 2800 2700 1 mm Figure 6. Image of TiLG685 showing the internal structure within the large grains. The crystallites are clearly visible, and spatial resolution is about 50 μm (reused from Smith et al. [2014] under Creative Commons Attribution License [CC BY]). ME | AMNDEOVERVIEW 54 M A T E R I A L S E V A L U A T I O N • A P R I L 2 0 2 2 Distance from surface (mm)
ASNT grants non-exclusive, non-transferable license of this material to  .
All rights reserved. © ASNT 2025. To report unauthorized use, contact: customersupport@asnt.org


